
Before & After: My New York Apartment Kitchen Renovation
Look at who finally got around to doing a Before & After post on their apartment. This is a very photo heavy post so I’ll keep this brief and let the photos speak for themselves. I just wanted to preface this by saying renovating is NOT an easy or short process. I was lucky enough to not live in the space while I was renovating and had professionals design and perform all the work. Also, it still took about 3 1/2 months to complete the entire renovation of my apartment.
AND I promise to not take forever getting the rest of my apartment posts up! If you’re not following me on Instagram make sure you’re doing that. I’ve been sharing a lot more photos from inside there!
BEFORE
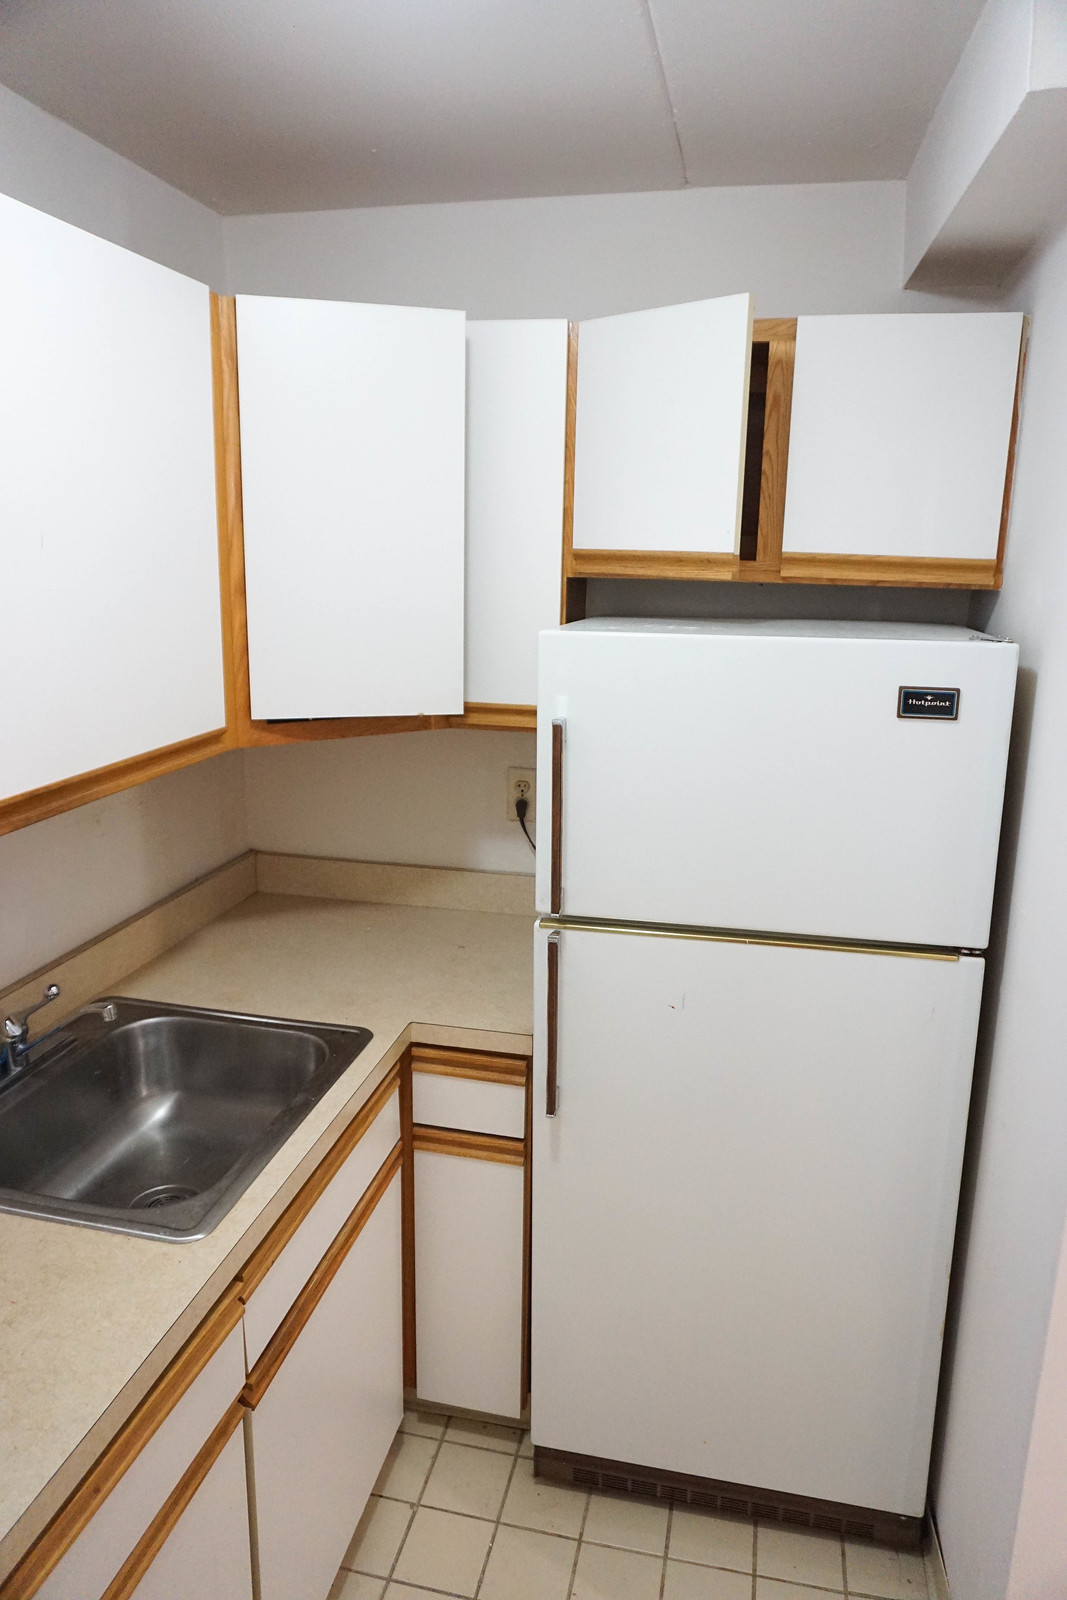
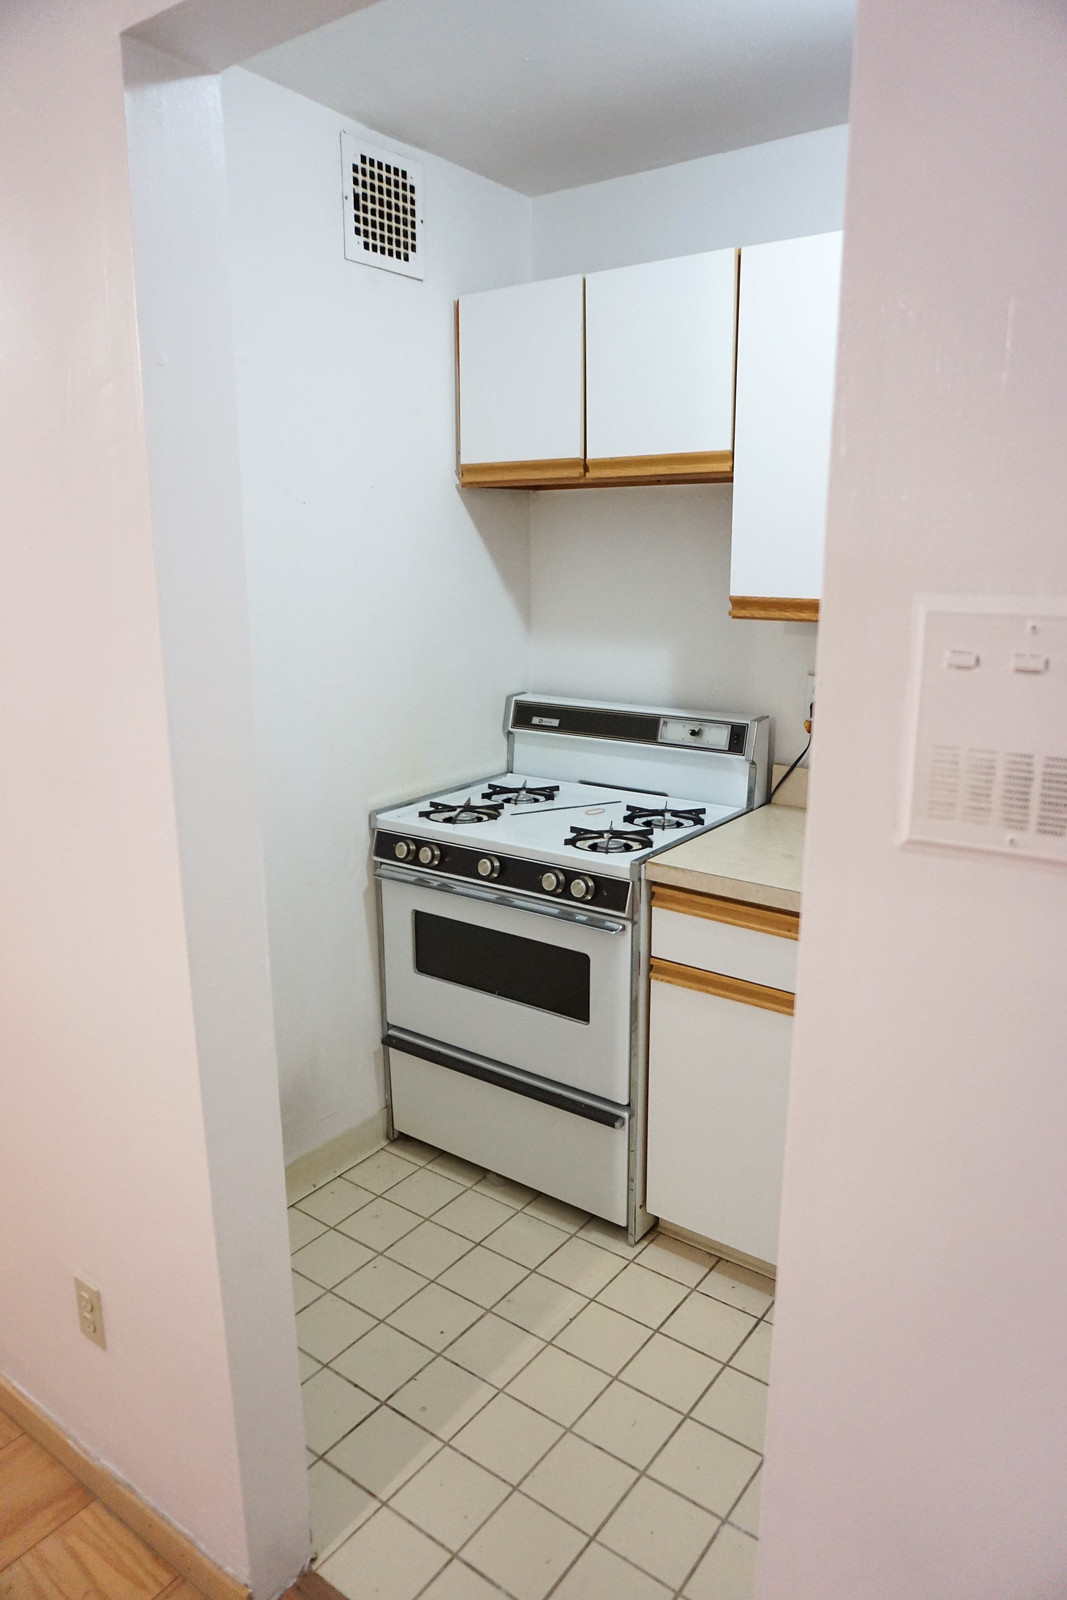
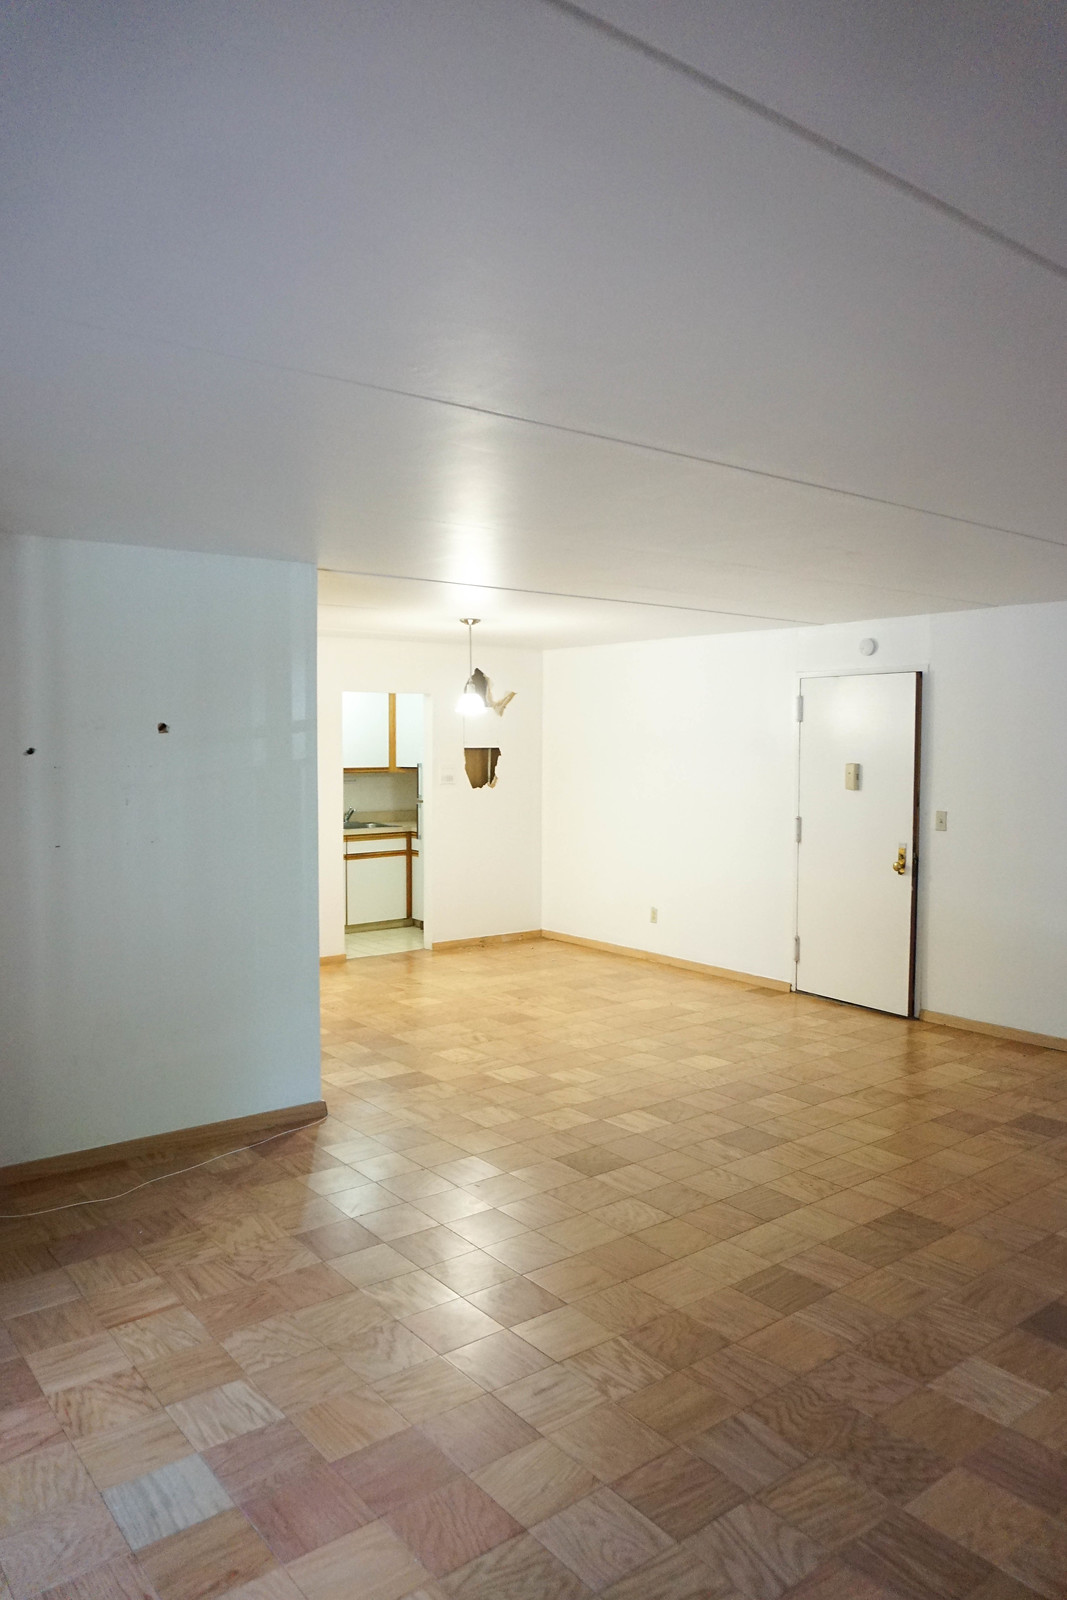
Here are the “Before” photos of my kitchen. I snapped them the day I closed on my apartment! The kitchen was TEENY TINY. Also, it’s old and not functional at ALL! And I would understand the size of the kitchen more if the apartment itself was small. Also, if there wasn’t any room for the kitchen to be any bigger. However, if you look at the fourth “before” photo you can see that there is a HUGE area of wasted space right outside the kitchen. The previous owner had a small kitchen table there. However, the second we saw the space we knew we had to take the wall down and make the kitchen larger.

STAGE 1
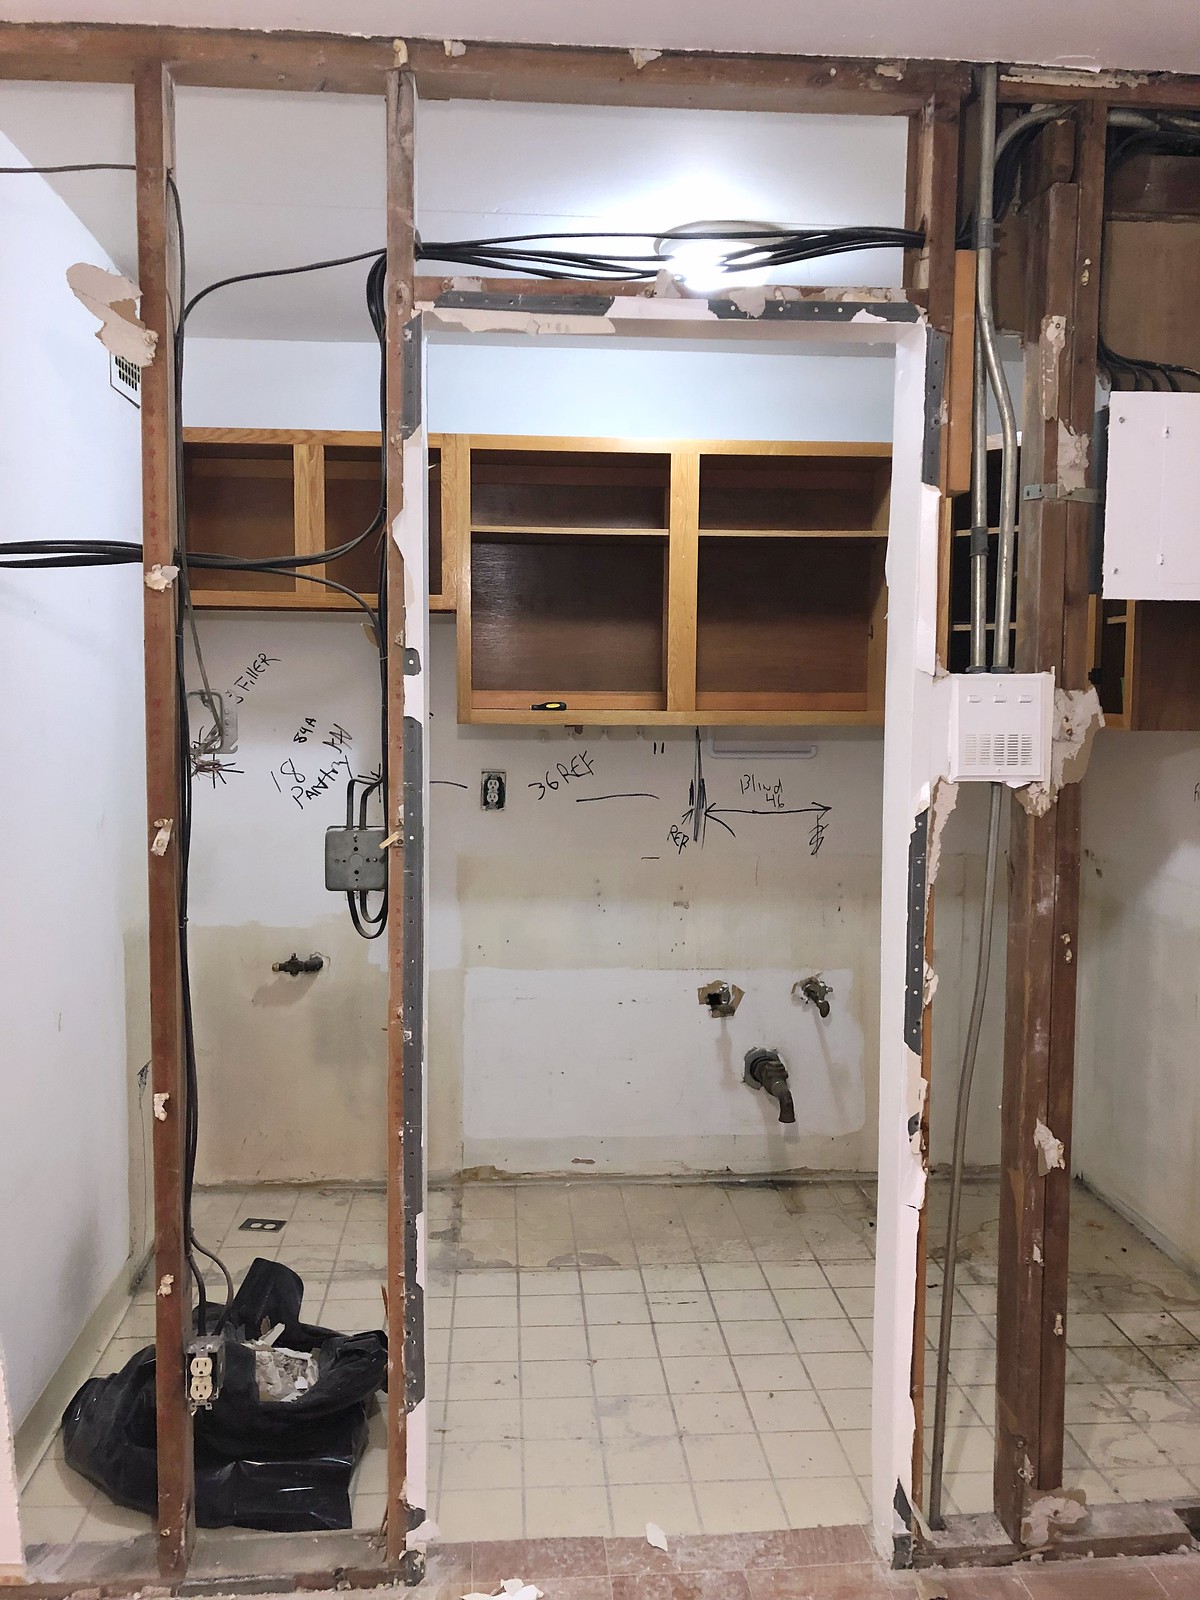
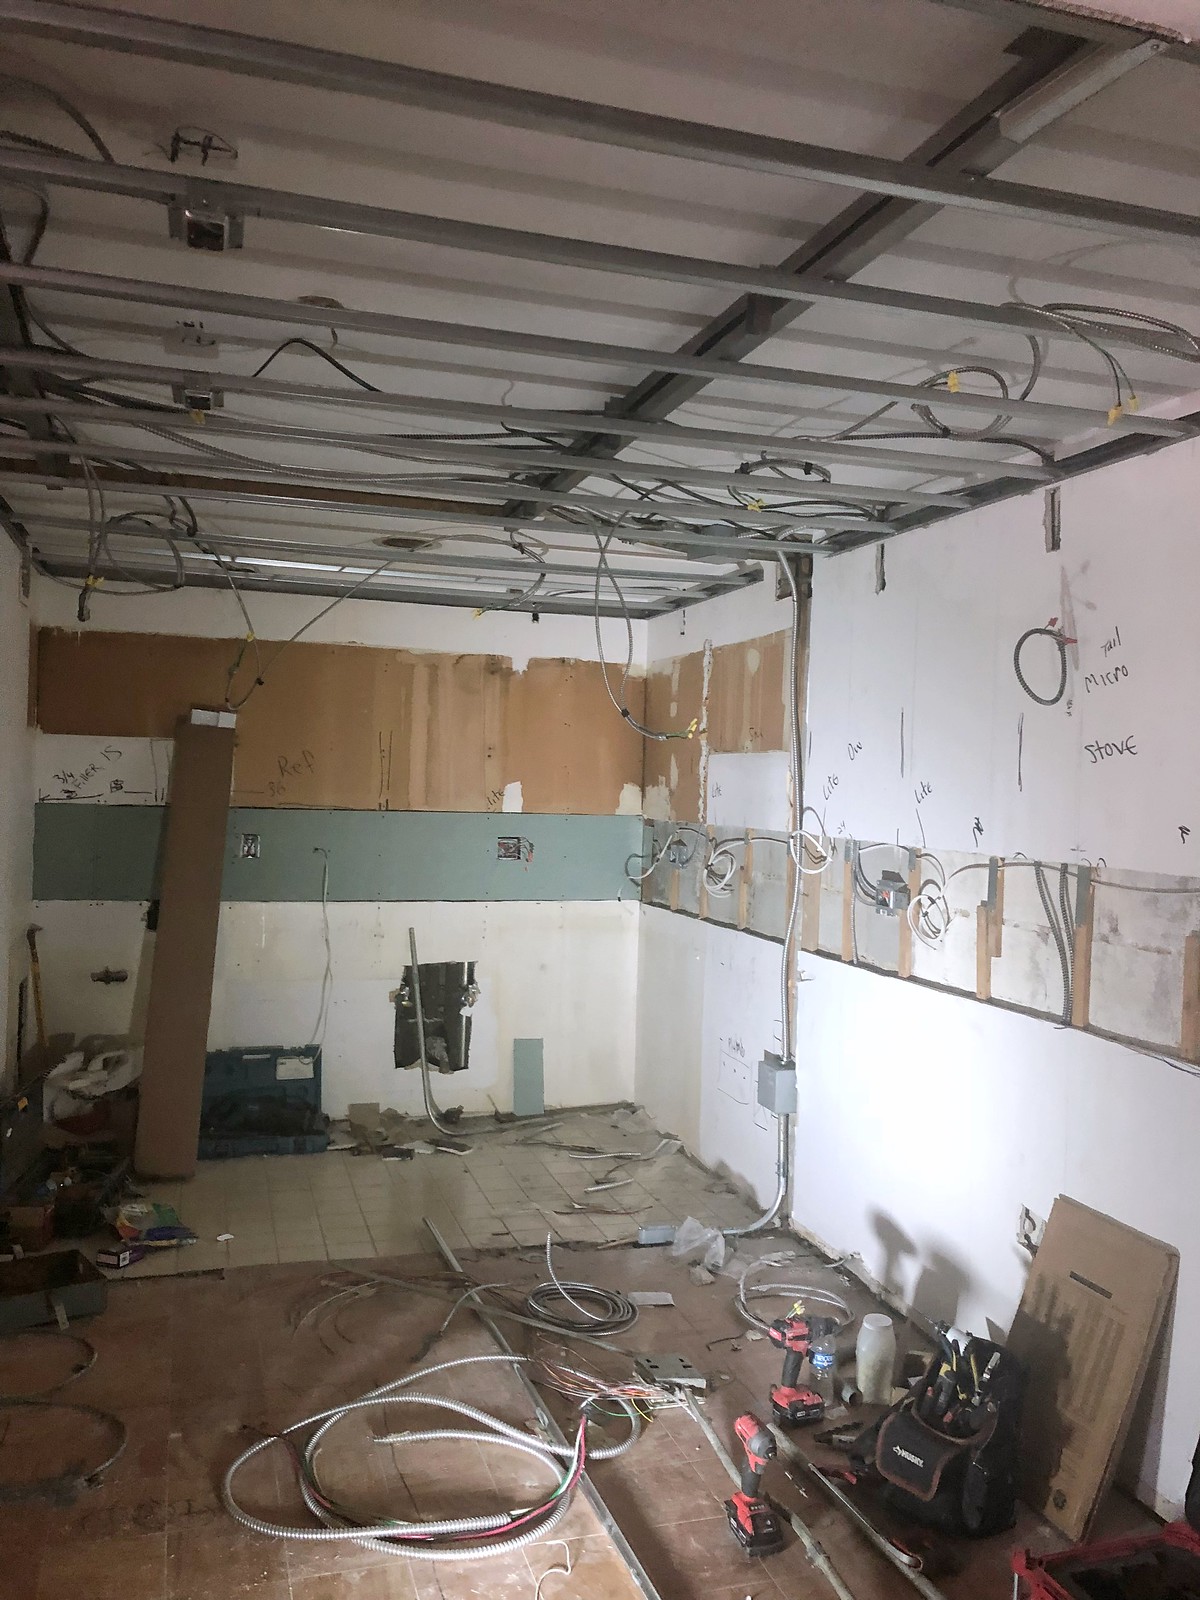
Stage one of my apartment kitchen renovation was taking down the 2 little walls. These walls closed in the kitchen from the rest of the apartment. So, we took out all the old cabinets and appliances. Then, marking out the new kitchen layout on the walls and floor.
One obstacle we had was that the electrical box for the entire apartment was in one of the walls that we wanted to take down. Also, it connected my power to the apartment above mine and below mine. Luckily we found out we were able to relocate the electrical box to one of the other walls in the kitchen. We did so by coordinating with my building supers.

STAGE 2
The next step to redesigning the kitchen was figuring out how to add lighting to the area. My apartment is L shaped and this area has no windows as it’s tucked in the bend of the L, AND there were only 2 overhead lights in the whole area so ceiling lights were needed (no one wants a dark kitchen). The biggest obstacle was that the ceiling of my apartment was CONCRETE, which means we couldn’t cut into it to run wires or add any lights.
Thankfully by dropping the entire ceiling a few inches over the kitchen area we were able to run electrical wires and add recessed LED ceiling lights to the whole area. Adding this dropped ceiling also allowed us to move all of the necessary wires to relocate the electrical box.
Not going to lie I didn’t love the idea of dropping the ceiling in the area of the kitchen because my ceilings aren’t that tall as it is (they’re only 8 ft.), but I’m so glad we ended up doing it, it was a necessity!

STAGE 3
The next stage of my apartment kitchen renovation was coordinating with my building supers to get the power shut off for a little while. We need to move the electrical box from the wall that was being taken down. Then, relocating it to another wall in the kitchen. The electrician also needed to run the wiring in the new dropped ceiling for the recessed lights that would be going in.
Also before the cabinets were installed we needed to figure out what could be done to move the plumbing for the sink from one wall to another. Because you don’t want to use pipes with a severe angle that would obstruct the water flow too much we had to keep the new sink not too far away from the old one, which wasn’t a problem. We also figured out that we would use corner lower cabinet as a dummy cabinet to hide the pipes.
Stage 4
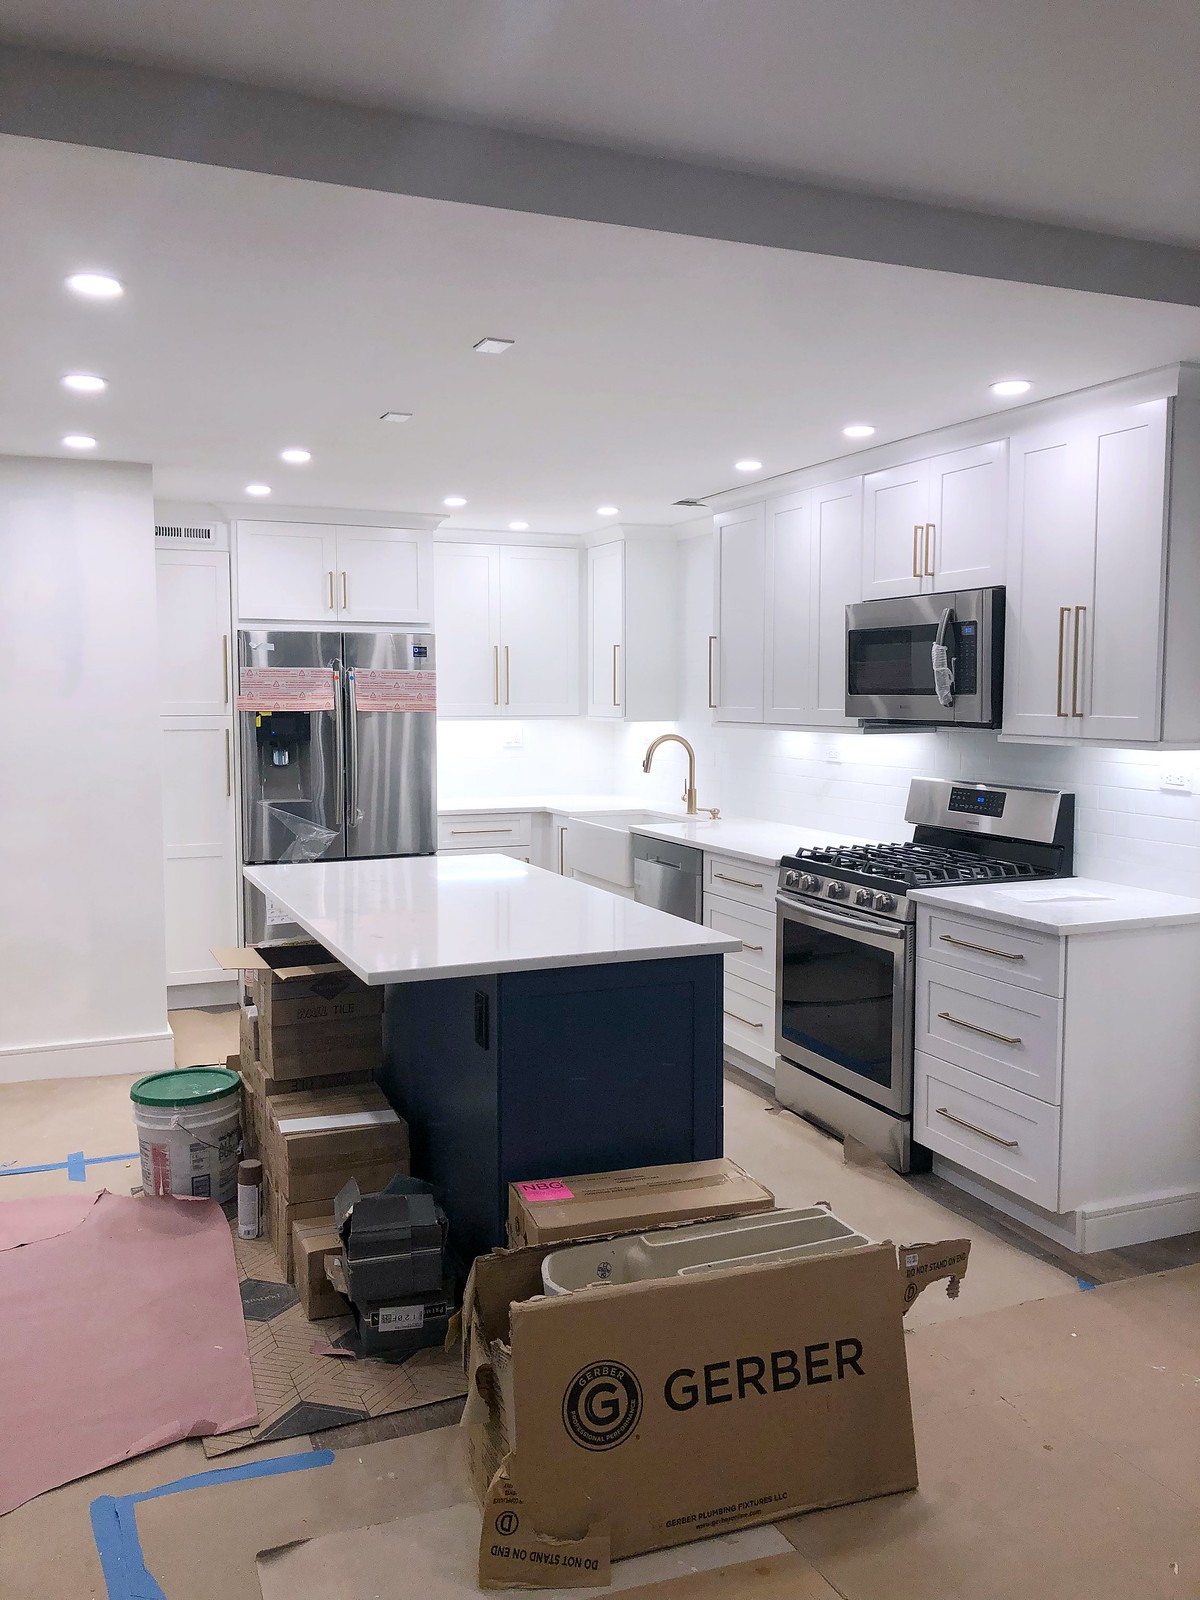
Flooring was installed in the entire apartment followed by closing up the new ceiling and installing all the cabinets, including the island!


Stage 5
Once all the cabinets were in, the appliances were installed and the recessed ceiling lights were cut out and installed. Then the template for the countertop was completed.
I also had to decide on the size of the handles on my cabinets. Originally I was going to do the smaller size ones on all of the upper cabinets and all of the larger handles on the bottom drawers, but we accidentally ordered the wrong amount of each so we tested out the larger ones of the top cabinets and ended up liking them more than the smaller ones! We ended up only using the smaller handles on the cabinets above my microwave and refrigerator.

Stage 6
The last step of my apartment kitchen renovation was installing the faucet and the subway tile backsplash. I went with just a classic subway tile with white grout because I wanted to keep the kitchen more basic and easily sellable.

After (Part 1)
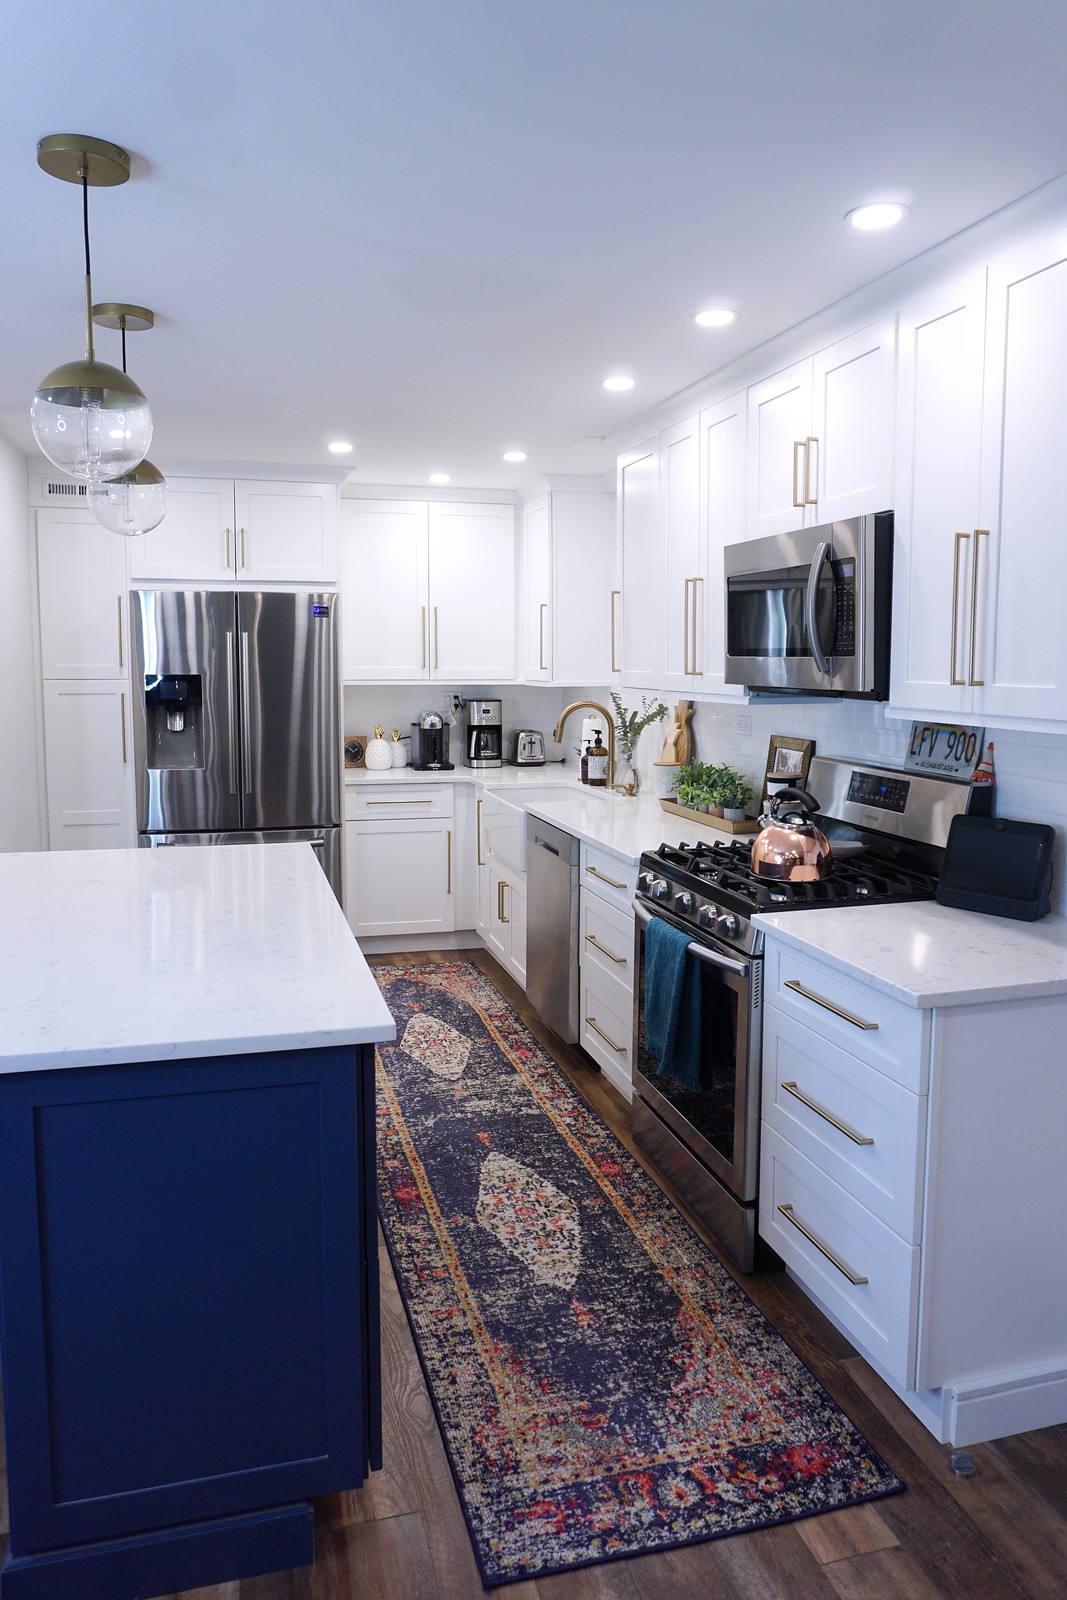
The last time I shared the “after” photos of my apartment last year the kitchen was missing a few crucial items. Since I’m the WORST at making decisions I lived without kitchen island pendant lights for a year simply because I couldn’t make a decision on them. I also still hadn’t decided on stools (these were a hand me down from my mom so I had something) and didn’t have runner yet.

After (Part 2)
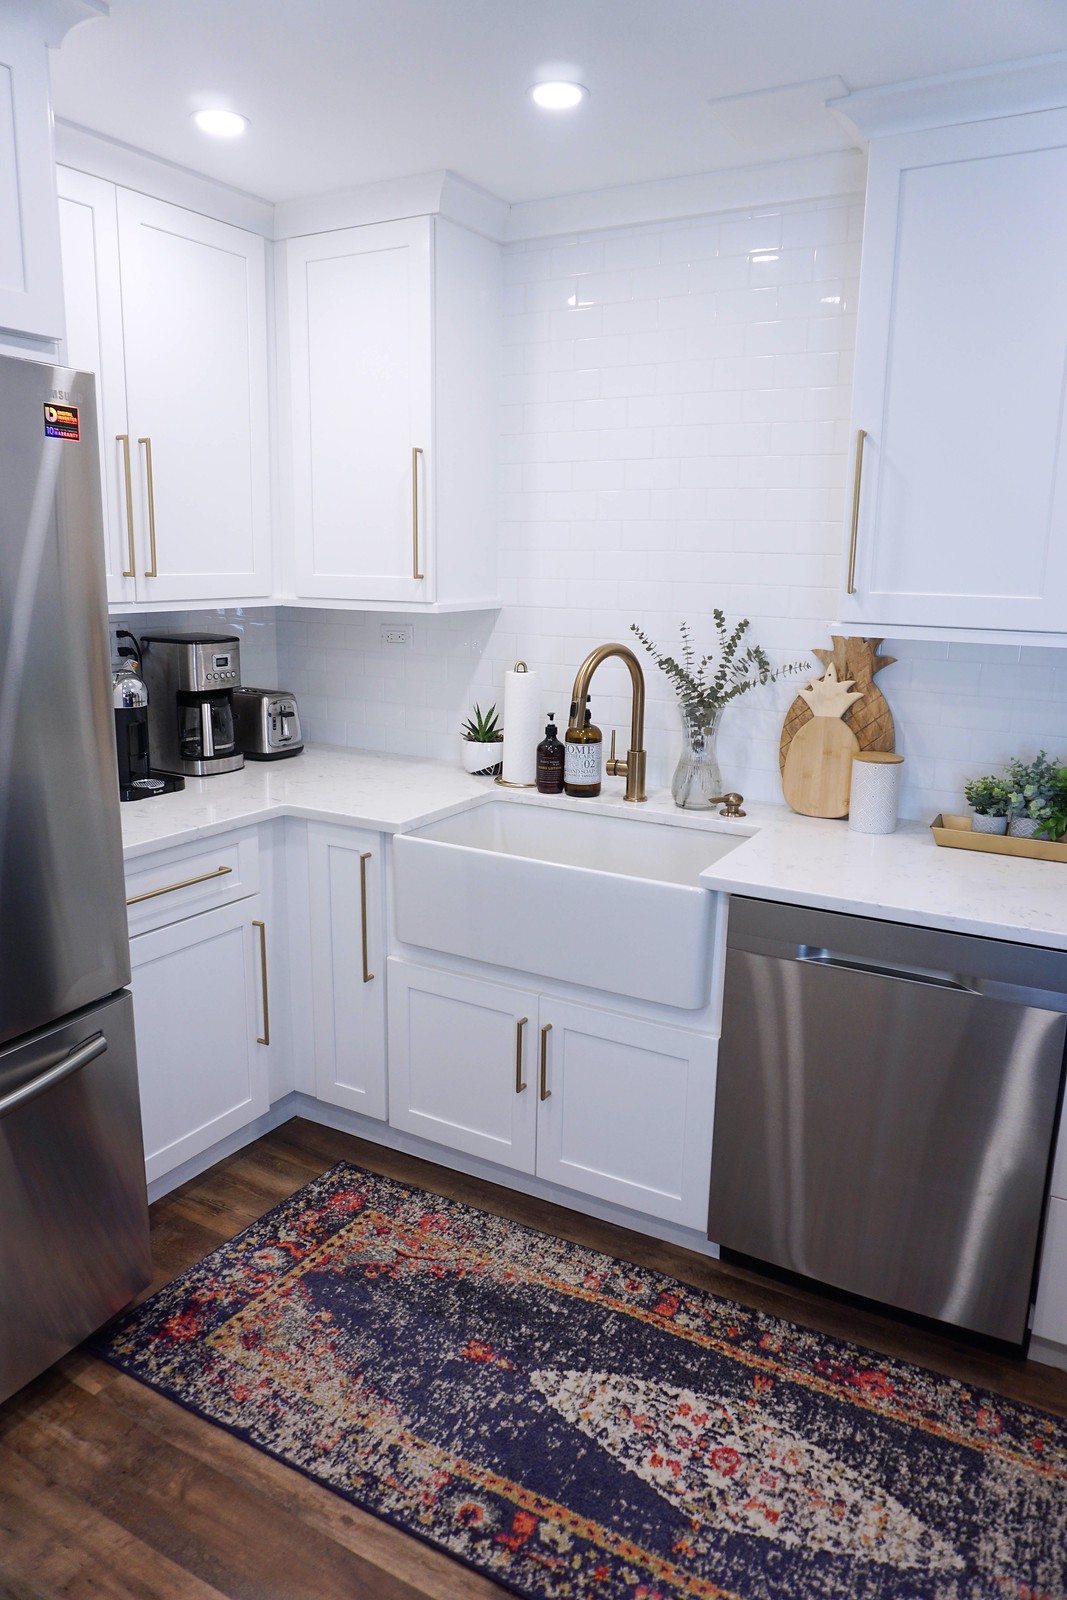
In the past year I’ve finally settled into my apartment. I added pendant lights, a kitchen runner and FINALLY buying new bar stools. Are these the final “after” photos? No, I’m always changing things up, but it’s way more “done” then it’s every felt!




Pin My Apartment Kitchen Renovation for later:

Shop my Apartment Kitchen Renovation:
Fabuwood Allure Galaxy Frost Cabinets | Wolf Home Products Indigo Kitchen Island
Samsung Stainless Steel Appliances via Home Depot | Top Knobs Kinney Pull Handles in Honey Bronze
Nantucket Farmhouse Sink | Delta Faucet Trinsic Single Handle Kitchen Faucet
Rugs USA Navy Iris Fading Runner | Brass Single Globe Pendant | Milana Tan Counter Stools
All cabinetry purchased at Kitchen & Bath Design Center in Bedford Hills, NY.
Check out more posts about my Apartment Decor & Renovation here:
Before & After: Feminine Chic Bedroom Renovation
5+ Practical Tips for Designing a Small Bathroom
My Entire Apartment Renovation AFTER Photos!
I’m Officially a Homeowner + My New Apartment BEFORE Photos
You can also follow my Instagram hashtag #homeaftermidnite







This transformation is INSANE!!!!
I’m the WORST at envisioning things, even with the whole space taped out on the floor and walls I still had trouble imagining it, so when I look back at the first photos I still can’t believe it’s the same space!
this is beautiful! im going through a similar entire home renovation in Toronto and it is hard to imagine what it will look like when its down to the studs.
It is a SCARY process, but definitely worth a few months of torture! I’m sure yours is going to look amazing!
xo Jackie
Hi Ms Jackie,
The before and after pictures are very beautiful!! Do u mind sharing what contractors you used in New York? I also live here in the city and would love to hire them as they did an excellent job!!!
Thank you
Hi Sara, My dad used to be a contractor so I was lucky enough that he did all the work for me!
How were you able to get permission to break the walls? We live in a 1970s apartment in Brooklyn and my mom wants to break the 2 little walls similar to yours to okay the kitchen into the living room but we don’t know if the building management company will agree. Some of the apartments in my building have a similar kitchen to yours only because it was renovated after previous tenants moved out.
I just went through the proper channels. Had to submit all the proper paperwork and plans with the building board and the building department and was able to get everything approved. The only really “drastic” thing I did was move the electrical box, everything else (like the pipes, water lines, etc.) all stayed in the same place which I think helped with the approval because it was mostly cosmetic.
i love the new look, I’m about to by a condo in MD right now and the properties aren’t up to date so I’m steady looking for designs for the kitchen, bathroom and floor